 We’ve secured funding to power Signal-to-Revenue AI to GTM teams globally. →
If you are a CMO, one of the hardest moments in ABM comes when the dashboard is full of ...
Guide to Adding TXT, MX, and CNAME Records in Google Cloud DNS (GCP)
Published
Categorized as Knowledge Base
Subscribe Now
Prerequisites
- A Google Cloud account with a project.
- A DNS zone created for your domain.
Steps to Add Records
Log in to Google Cloud Console:
- Go to https://console.cloud.google.com/.

Navigate to Cloud DNS:
- From the left menu, select “Networking” > “Cloud DNS”.
- Click on the DNS zone for your domain (e.g., example-com).
Add Record Set:
- Click “Add record set”.

Adding a TXT Record
- DNS Name: Enter the subdomain (e.g., sub.example.com.) or just example.com. for the root.
- Resource Record Type: Select TXT.
- TTL: Set to 3600 seconds (or customize).
- TXT Data: Enter the text value in quotes (e.g., “v=spf1 include:_spf.google.com ~all”).

Adding an MX Record
- DNS Name: Enter example.com. for the root or a subdomain (e.g., mail.example.com.).
- Resource Record Type: Select MX.
- TTL: Set to 3600 seconds.
- MX Data: Enter priority and server (e.g., 1 aspmx.l.google.com.), one per line. Include trailing dots.
- Click “Create”.

Adding a CNAME Record
- DNS Name: Enter the subdomain (e.g., www.example.com.).
- Resource Record Type: Select CNAME.
- TTL: Set to 3600 seconds.
- Canonical Name: Enter the target (e.g., example.com. or anotherdomain.com.).
- Click “Create”.
Save Changes:
- Click “Create” for each record. Propagation may take a few minutes to hours.

Reference
Video: Create a Google Cloud DNS Zone from scratch in 8mins using Shared VPC
Docs: https://cloud.google.com/dns/docs/records
Notes
- Propagation Time: DNS changes may take anywhere from a few minutes to 48 hours to propagate across the internet, depending on TTL settings and DNS provider.
- Verification: Use tools like dig (e.g., dig example.com TXT) or nslookup to verify records after adding them.
- Trailing Dots: AWS and GCP often require trailing dots for FQDNs (e.g., example.com.), while Azure and GoDaddy typically do not.
This guide ensures you can configure DNS records efficiently. For specific use cases (e.g., email setup, domain verification), refer to the service provider’s documentation.
Other blogs
The latest industry news, interviews, technologies, and resources.
March 16, 2026
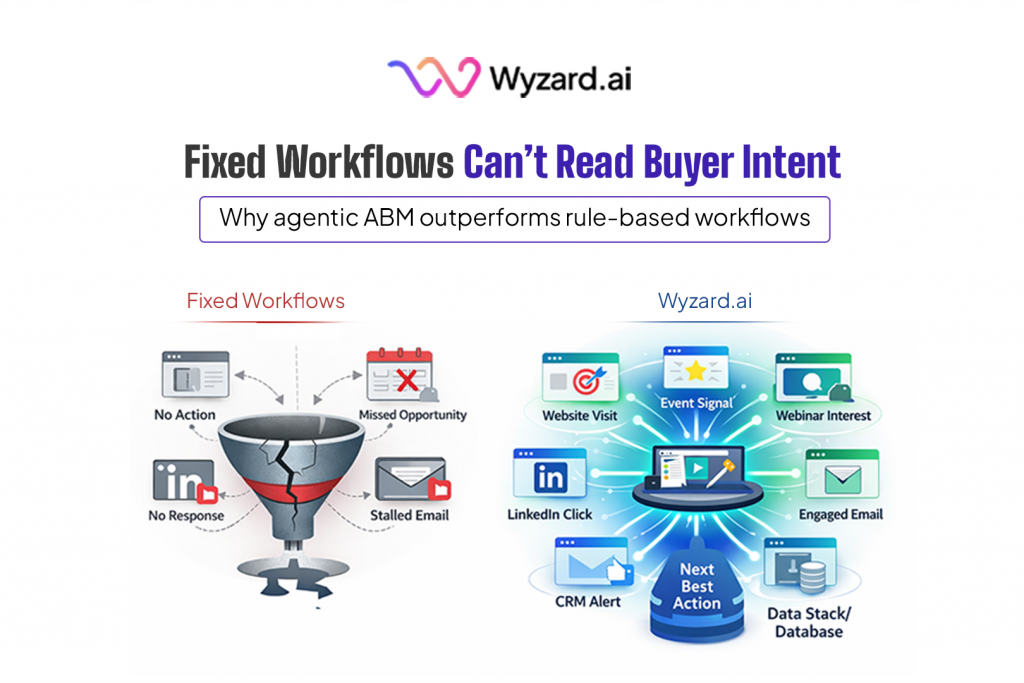
Automation Isn’t Intelligence: Why Agentic ABM Outperforms Rule-Based Workflows
A CMO reviews the weekly pipeline report and sees all the expected activity. A target account visited the website. ...
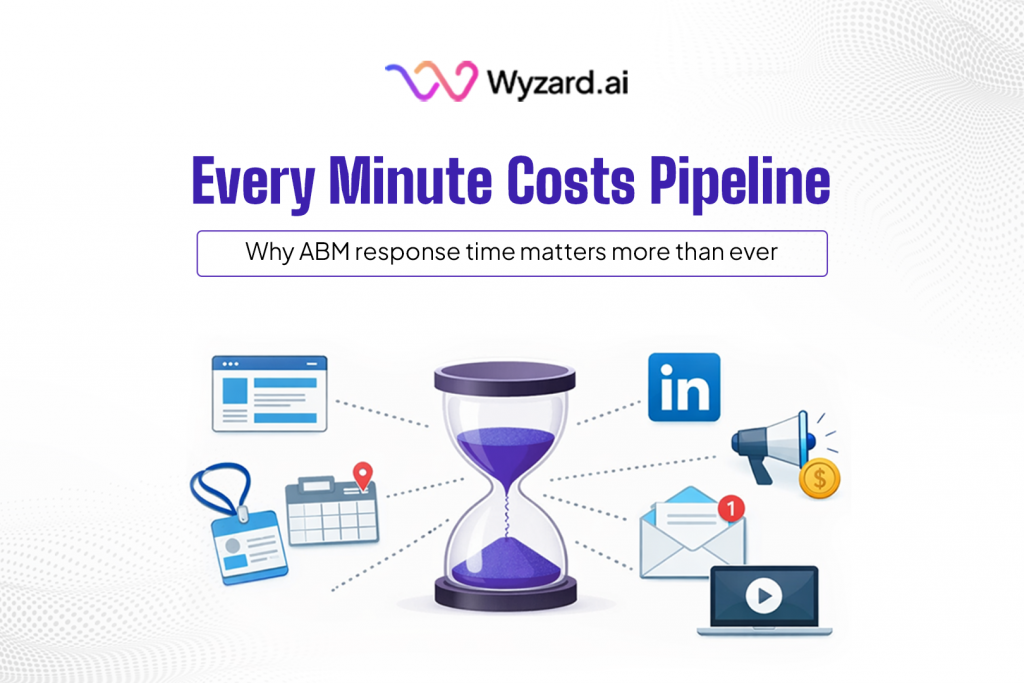
The 5-Minute Rule for ABM: How Fast Response Turns Buyer Intent Into Pipeline
If you are a CMO running enterprise growth, you have probably seen this in a pipeline review. A target ...
